Roomba could provide you with some errors once you set it to recharge which should be resolved to make it useful. One of many errors is ‘Roomba Error 2’.
Learn how to decide Roomba Error 2
Principally, error 2 signifies the issue in its rollers that are unable to show. So, you need to pull the rollers out of your Roomba system and run the system without rollers inside now. Often, Roomba brushes are soiled on this case and also you hear a special sound.
My Roomba says:
(i) “Error 2, Open Brush case and clear brushes.”
(ii) Roomba Retains Saying Clear Particles Extractors
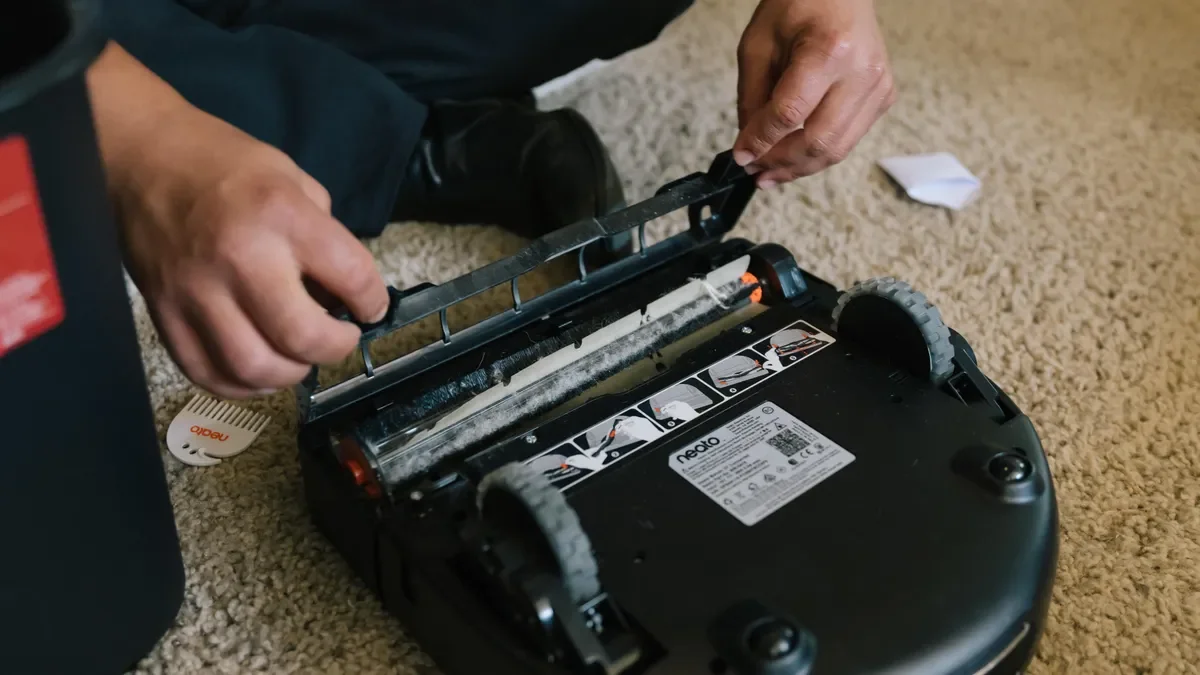
Flip the system and maintain its bottom in your entrance.
Now, open its cleansing head door by pushing on the inexperienced curler’s body on its proper aspect.
Take away the curler and take them out.
Flip over the Roomba and place it with the entrance aspect in your direction of you.
Now, you need to place it on a flat floor and run “Clear.”
When you see error 2, then it is best to carry out the next upkeep.
So, principally, error 2 signifies that there’s something caught within the brushes which you’ll be able to see at the bottom. It might be some hair or particles.
Learn how to repair Roomba error 2 | 5 Steps Information
1. Clear your Roomba Brushes
- To begin with, take away the brushes identical to those within the earlier step and pull them out.
- Now, it is best to take away the obstruction (hair, dust, particles).
- You should utilize the cleansing software which was supplied by the corporate together with your Roomba system.
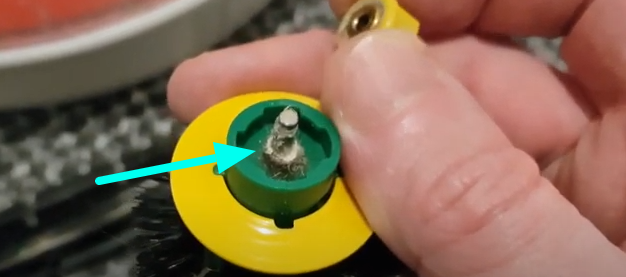
- Pull out the tiny cowl above the comb and clear it. You may even see mud and dust in that space.
Clear the Brush Sides
When you might have cleaned your system’s brushes, you possibly can attempt turning on and operating it and verify whether or not it’s all proper.
2. Change the Battery Module
In case your error nonetheless persists and you might be unable to resolve the issue, attempt the next steps. Now, it’s worthwhile to change your brush module.
- Firstly, Take away your dustbin out of your system.
- You’ll merely take away and pull out the aspect brush of your system.
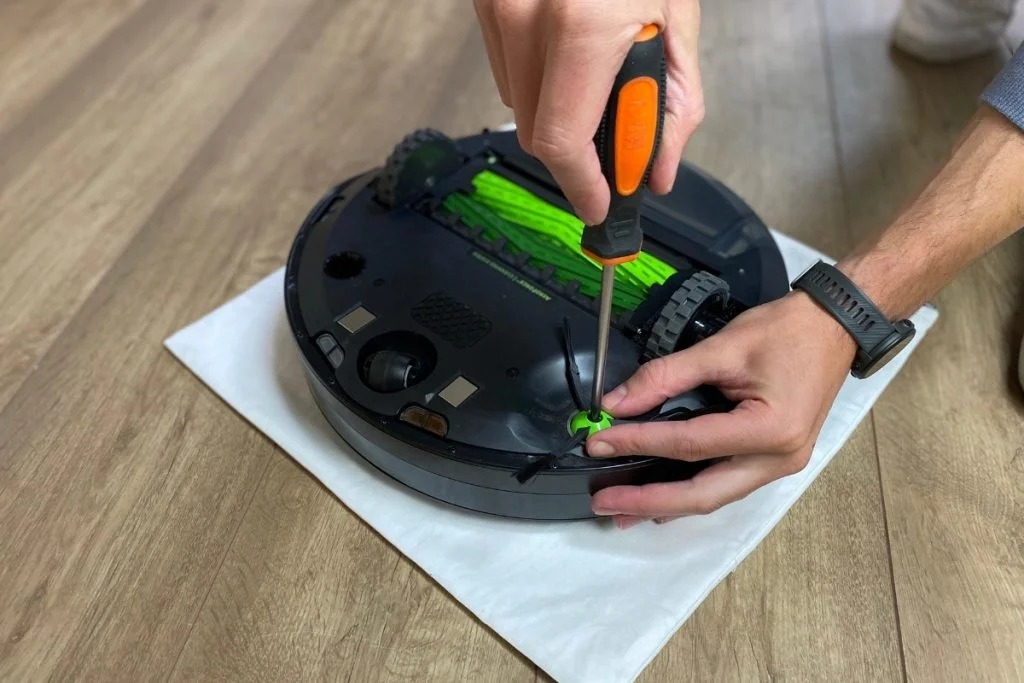
- Now, you need to open the screw with a screwdriver to take away the battery cowl.
- Alert! Just remember to take away the battery to keep away any quick circuits.
- Now, take away the battery module by unscrewing it from each nook.
- It is best to now change a brand new battery module rather than the previous one.
- Just remember to tighten all of the screws again, place the battery and put its cowl.
3. Clear Roomba Extractor Body
To begin with, pull Roomba extractors out of the system
Now, it is best to clear the world the place extractors sit the place they transfer, and rotate freely.
- Open the Roomba again cowl with the assistance of a screwdriver.
- Just remember to take away the battery to keep away any harm.
- Now, open the screws and take away the aspect brush.
- Take high-pressure Air Cannon.
- Now, clear all of the mud from the Roomba compartment.
- Take away the 2nd body the place extractors go.
- Flip the extractor’s panel and clear it with air cannon.
- Set up all the pieces as it’s and activate Roomba.
4. Substitute the Roomba’s brushes
Roomba brushes could get previous which impairs the efficiency of the Roomba system. The typical lifetime of Roomba’s brushes is as much as 12 months after which they wanted to get replaced.
Just remember to have a normal-sized screwdriver accessible.
Open the again cowl of the Roomba by opening its screws.
Now, take away the backside cowl rigorously as it’s a bit delicate.
Take away the brushes by pushing your finger on the tiny button in the direction of the brushes.
Now, pull out the brushes together with your hand rigorously.
That you must change new brushes and set them in the place of the previous ones.
Line up each brush and ensure you match them
Now, tighten all of the screws and shut the again cowl.
5. Reboot Your Roomba

Most digital gadgets work correctly when they’re restarted after any challenge in them. As a result, generally, there could also be a software program malfunction that’s stopping the system to work correctly.
a) For S and I collection fashions
To begin with, press Clear and maintain it for about 20 seconds till the white LED begins spinning look ahead to several seconds.
Now, let the Roomba activate and verify whether it is working correctly.
b) For the 700, 800, and 900 collection
To begin with, press Clear and maintain it for about 20 seconds till you hear a beep.
Now, let the Roomba activate and your system will probably be rebooted.
Learn how to Reset a Roomba
If you’re unable to get the answer from all of the above-mentioned strategies, it’s essential to attempt resetting your Roomba which can assist you.
To begin with, maintain on to Spot and Doc for nearly 10 seconds till it will get off.
Now, flip it again without the duvet.
So, you’ll expertise a greater gentle without the duvet.
(I’ve achieved this reset for my mannequin 560 collection however it’s nearly identical for different fashions as effectively.)
It is best to go away the button once you hear a particular beep.
Now, your reset will probably be accomplished.
Just remember to maintain the Roomba on the charging base for a somewhat longer time.
Contact Assist
When you have tried all of the approaches talked about above and you might be unable to seek out the answer, this means that the issue is in your system by the manufacturing facility. You have to contact the official assistant of Roomba.
They’ll inform you of the most effective and resolve your drawback. Hopefully, You’ll get a brand-new battery.